Disclaimer: I do not hate any characters, whatever I review about is based on the playability of the card and the strategic of the game. Neither will I oversell any characters even though I am a fan of DC.
New Keyword
Continuous: Any action die that is continuous stays in the field when you use them, it does not go to your used pile at the end of your turn and will only move out of the field when your opponent or you moves it away with an effect.
Also, there might be some words that you might not understand from this article, these are terms we used in the game,
Beefy - Strong stats
Ramp - Effects that allows you to roll more dice
Ping - Dealing damage to a character
Pump - Additional stats to a character
Spill damage - Damage from overcrush
Swarm - Having way more characters in the field than your opponent and attacking with all of them. Not to be confused with the Swarm Keyword. Each card will be rated according to their ability, cost, stats and affiliation.
1/10- This card is useless, it helps your opponent more than you do.
2/10- This card is almost useless, try not to use it.
3/10- This card is too expensive and the ability is not as great.
4/10- This card is cheap, but the ability could be better, use other cards that have the same cost but better ability instead.
5/10- Mediocre card
6/10- With some set up, you can make this card work, but it really takes a lot of effort to make this card work.
7/10- This card is above average
8/10- This card is great, with the right combo you can destroy your opponent with this card
9/10- This card is amazing, you can use this card in almost any environment
10/10- The perfect card, if you play with this card you have an extremely high chance of winning the game.
(Note: The rating are based on my opinion, your point of view will definitely be different)
Basic Action Card

This is a great BAC, cost reducing effect is definitely viable in the game and the fact that you can drop it in your bag immediately after purchasing a die makes the effect even better as you have a chance to use it next turn. A cheap and versatile action, definitely worth the cost.
8/10

This action would be helpful if your opponent plays characters of the same cost, however, it does possess some risks when using this action. Whatever number that you picked for this action, there is a chance that your characters in the field have the named purchase cost, and will be vulnerable to this action. Another risk that you are taking is that your opponent need to roll their character away in order to send them to the prep area. Instead of relying on luck, you might want to use characters that simply knocked out another character or characters that reroll all your opponent's character instead.
6/10

A 2 cost action is always worth considering. This action helps if you are playing an aggressive team, if your characters are knocked out in the attack step, your opponent would be forced to knock out that many character as well, it can shrink your opponent's field but also gave them a chance to refield their characters with fielding abilities.
6/10

This is a supportive action for your aggressive team, you can don't worry about your characters getting knocked out because if they do, you gain life, which is a good deal. You will put your opponent in an unfavourable position that they have to declare their blockers very specifically or you could end up healing your life back to 20.
7/10

If you have different character die in your field zone, then you will be able to deal up to 9 damage to a target character, for a 3 cost card it is rather good, but it takes too long to set up to make this action very powerful. The burst side is a bonus given that you can deal 1 damage to your opponent. The global on the other hand is not very appealing, given that Magic Missile global does the same thing but only requires 1 bolt.
6/10

If you intend to play a villain team, then using this action to deal damage will be decent, if you have all villains in play, you can deal up to 9 damage when you use the double burst side of this action. It does prevent your opponent from buying this action due to it's cost and the effect on the double burst if they don't have any villains, but if you are not playing a villain team, don't bother using this action. The converters global is not that great as well, you will need a mask and a fist to convert a character to a villain, which is ridiculously expensive.
8/10

This action allows you to ramp die, the number of die you can ramp will be dependant on your luck. You can have 1 die or 3 dice to ramp if you are lucky; a minimum of 2 if you get the double burst. Personally, I am not a fan of luck, so I would rather use Gearing Up BAC instead.
4/10

This action is great as it can make your character unblockable, and it's only 3 cost. The drawback is that your character will be nerf to level 1 for using this action. Level 1 has lower stats and you can't argue with that, so you need to make sure that your characters can still do a fair bit of damage at level 1 for this action to be useful for you. That global can come in handy as well as you can have the choice to spin down a character, to nerf it or to reveal the burst side.
8/10

This is a very defensive yet offensive action. It prevents your opponent from trying to finish you off with a one hit knock out move, and whatever your opponent does that deals you damage, this action will deal your opponent that many damage. Your opponent would be very careful in his/her turn while this action effect is ongoing. A good action that can buy you some precious time in the game against an aggressive opponent, but be careful, you need to have equal or higher life than your opponent for this action to work well, if your life is lesser than your opponent, you opponent could deal you enough damage on their turn to finish you off while still having some life left to stay victorious.
9/10

Forcing characters to attack might not be a bad thing, but the action is really specific, there are different intentions to use this action; triggering your attacking character's ability but doesn't want them to be unblocked and leave the field, forcing your opponent's character to attack and try to knock them out or some other reason that I have yet to figure out.Whatever the case is, don't use this action, it doesn't help you anyway, your attacking character trigger their ability but they don't get to deal damage, so what's the point, there is risk in them getting knocked out as well. If you want to force your opponent to attack and then you try to knock them out, why not just find another more efficient method to do so.
6/10
Character Card

This is an anti-sidekick character, you can keep him as a backup just in case. For 6 costs, and his stats, he is quite decent.
5/10

This card will be good in a WOL constructed, but apart from that, don’t expect a lot of green or blue lantern to show up in a full constructed game. The intention for this card is to force your opponent’s blockers to block him while the other of your attackers is left unblock, you might want to use Spiderman: Webslinger instead as this card is too specific for the ability to trigger.
3/10

A fielding ability on a character with high stats is such a waste, if you need more dice in your prep area, there are other ways you can do so. The issue with the ability specifically targeting only green and blue lanterns makes it worse.
3/10

This is a better Anti Monitor, it makes your opponent worry about keeping their sidekick in their field zone. If they decide to keep their sidekicks in the field zone, your Anti Monitor will deal them damage, if they decide not to keep their sidekicks, your opponent's field will be much smaller. Either way, you are putting your opponent is a bad situation, which is good for you.
7/10

Atom is really tricky, when you play him; you need to know how to use him. The one thing I could think of is simply attacking with him when he has a higher level and block with him when he has a lower level, his level 1 can neutralized all opposing level 2 and 3 overcrush damage.
6/10

Making atom stays at level 1 is the safest method to prevent him from being affected by opponent’s ability, it is one counter against abilities from your opponent, but atom really isn’t a threat so your opponent probably wouldn’t target it anyway. Also, level 1 character can affect atom regardless.
4/10

This is similar to the common version but with the difference that you can remove him from the field zone instead. Good and bad, you don’t take damage but you don’t deal damage as well. For his stats and 4 cost, I don't think I would use any version of him in this set as he is too expensive for his ability unless I am playing an Indigo tribe combo.
4/10

There are quite a few shield characters that can be quite annoying in the game, you might want to keep Atrocitus in your team in case you need to counter that, don’t worry too much about the 6 cost. If you are using red lantern team, use Kyle Rayner: Hopeful Will and Big Entrance, you can easily purchase Atrocitus for 1 cost. Usually a red lantern team is more aggressive and when facing shield characters, you may have some problem as most of them have the defence against your offense, so who knows, Atrocitus might be your saver.
3/10

This is another great counter against Shield characters, your red lanterns surely will knock out your opponent’s character if their defence is not too high, with the help from Atrocitus, your opponent’s shield characters goes to the used pile instead when knocked out, further decreasing the odds of them coming out the next turn. Just be careful not to use shield characters in your team because Atrocitus ability affects your characters as well.
6/10

Although the ability is decent, having fielding ability on Atrocitus is such a waste. What is worst is that his second part of the ability can only counter emotional conduits instead of all action die. With higher cost and weaker ability, I will pass on this card.
3/10

This card work almost as similar to Angel: Soaring, but in this case, ability only triggers when you use a basic action. Batman has a really high fielding cost, if you think it’s worth to pay the fielding cost to make a guaranteed 3,5 or 6 damage, then go ahead and use this one. But for me, I rather use Angel instead as he is way cheaper to purchase.
8/10

A Batman with active ability is great, it is always because of his fielding cost then stops people from using him aggressively. If you are using an action combo, you really need Batman, because he keeps dealing damage every time you use a basic action. What’s better is that he deals damage when your opponent uses a basic action as well, so it makes your opponent think twice before buying basic action die.
10/10

There is Baron Zemo: Thunderbolt to do the job for recycling basic action die, so you can use other version of Batman instead. Is not that he is not useful, but Batman can’t generate basic action die as fast as Zemo can, because he can only do so once per attacking die while Zemo can do as many as he wants as long as he is active and has enough energy to do so, and Zemo can recycle any action die while Batman is limited to only basic action die.
7/10

If you intend to use Batman as an attacker in your action combo team, this would work. It kind of gives you a consolation price for not rolling your basic action out. If you can get enough energy side on your basic action die, you can make Batman very strong. Even so, I personally feels that 6 cost is really too much for such ability, even if it makes Batman strong, the purpose for you to buy an action die is to use them rather than getting the generic energy side of the die.
6/10
All versions of Batman has a global which is great if you decide to use basic action die in your game, it works like Resurrection and villainous pact global with the exception that you can use any energy.

All teen titans’ characters are awesome, including him. Beast Boy stats and his cost is decent, but if you are playing a teen titans combo, you are probably using Starfire to do the damage, so beast boy will be a sitting duck in your field. Even so, his ability is great as well; you just need to keep a fist in your reserve pool for him to get the additional bonus, which will help you in attacking or blocking.
7/10

An unblockable character sure is powerful, that being said, Beast Boy at level 3 has no effect, since everyone can block him. If you are not using Beast Boy as an attacker, you might want to use the common version instead, since that additional stats might come in handy.
6/10

This is a more costly Beast Boy, but more dependent on luck. He can go as high as 12A 12D if your luck is great when triggering his ability, but you might also not get any bonus out of it. If you are not really daring to go big, I still suggest you to use the common version as it is a better and more stable Beast Boy.
6/10

The black lantern characters forces your opponent to change his/her strategy almost immediately. When Aquaman is active, you should not have any character in your used pile, because you and your opponent will be force to move a character die from a player’s used pile back to its card. Imagine your opponent spends 7 costs to buy a character, hoping to counter you in the next turn but Aquaman send it back to its card, how sad would that be? If you haven’t purchase all the characters you need in your game, do not attempt to buy Aquaman first, because he will just make you suffer almost as much as he makes your opponent suffers. You should have all your characters in the field and no intention of leaving it, and Aquaman can do the effect to hurt your opponent.
6/10

Black Lantern Batman is not as powerful as Aquaman and Wonder Woman, but the global sure is special. To make full use of Batman, you need to make sure that you have purchase all your characters first, and then you get Batman into the field. You need to get him out fast because if not, your opponent probably wouldn’t buy anymore characters once he/she has every character for his/her game.
8/10

Superman hurts each player almost as much every turn. He will definitely hurt you but you need to see if it’s worth it or not, if you are can keep all your characters at level 1, then you won’t be as much trouble as your opponent. In my opinion he is the weakest member of the black lantern but the global does stack with Batman. You can use him for the global if you have no intention of buying him.
8/10

Wonder Woman's ability is almost as sick as Aquaman, but instead of sending character back to their card, she simply sacrifice them, and what is great about her ability is that you and your opponent can sacrifice each other's character instead of your own. If you only have Wonder Woman or Black lanterns in your field, then your opponent would be forced to sacrifice one of their character, she will definitely shrink your opponent's field.
7/10
If you are playing a pure Black Lantern combo, you just need to focus on getting all your Black Lanterns out, Wonder Woman will move your opponent’s character away and Aquaman will move it back to their card and your opponent will suffer. Batman will make them pay 1 life to purchase those character back and Superman will deal them damage before the character is move out from their field. If you can’t move any character because there is no characters in your opponent’s field, then lose 2 life, no big deal because all you need to do is attack with your black lanterns when your opponent’s field is empty, no matter what their level is, you definitely will deal your opponent 20 damage.

A low cost red lantern, so if you want to purchase her and then use Kyle Rayner: Hopeful Will to reduce cost of another red lantern, you can do so. For her cost and the red lantern affiliation I think it’s worth it.
4/10

If you want to use this version of Bleez for the effect that allows her to be placed directly into your bag when purchased, you might want to use the common version with Big Entrance BAC instead, it is cheaper. For 4 cost and no other ability, I will pass on this one.
4/10

A great counter to any action die that is in play. The only problem is that she might be a little harder to exit the field at level 3. Even so, you will probably use her to get rid of action die and only need her re-fielded when the action die comes back.
7/10

Although she is low cost, but her ability really isn't anything special. Capturing a green lantern is no big deal, especially the fact that none of the green lanterns are really a threat and not all players use them, and you need to return them at the end of the turn so it really doesn't help much.
4/10

Same problem, her ability doesn’t impress me much either, in a full constructed format, no one would really use green or blue lantern that much, so her ability won't threaten my opponent that much.
4/10

This is a much better Carol Ferris, having an active green lantern in play means that Carol Ferris cannot be knocked out, so she can be a permanent blocker in your team. What's great about getting her ability to trigger is that you don't need to rely on your opponent's character. Her ability may sound unimpressive, but having a potential 4D from a 2 costs character every turn is impressive.
7/10

This very cheap red lantern that can help you to gain more powerful red lantern with Kyle Rayner’s help. Although his fielding cost is a little expensive, but your ultimate intention is to have strong characters in play, so I think it’s worth it.
5/10

If you are intending to play different lanterns, then I suggest you to use this Dex-Starr instead, with the help of other lantern, he can get a potential 11A. That is awesome for a 3 cost character.
7/10
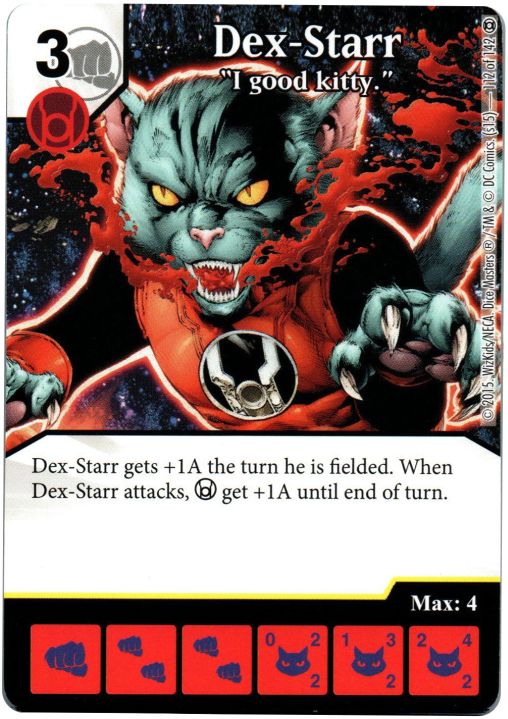
This is a red lantern supporter, this is a stackable ability, so having more Dex-Starr in your field gives you more advantage, if you have 4 of them, when all attack, all your red lantern gets +4A including Dex. That is so much potential in just a 3 cost character.
7/10

When you are playing different lantern team, you will need fatality, with all 8 colours in play, she can deal 8 damage to a character, which can knock out almost anyone in the game.
7/10

This is a great character for a bolt combo team, with the help from Iceman global, she can easily deal 3 damage to your opponent every turn. What’s more is that you can still spend those bolts for something else even after triggering her ability.
8/10

Doubling her attack probably wouldn’t help much unless you gave her overcrush and use global to increase her attack, but the defence part does help. Having at least 6 defence against higher level blocker is really a very good defensive character, stacking up with other defence bonus; she can counter an aggressive team. This is the least appealing Fatality among the others, but each have their own utility.
7/10

This card is a very aggressive Gardner. If you attack with all your characters, his attack has no limit, and that is the true power of a red lantern. He is just 2 cost, so his ability is super worthy.
10/10

If you don’t feel like being forced to attack every turn just in case you have no blockers for your opponent’s attack, or you want Gardner to stay in the field so you can purchase a higher cost red lantern with the help of Kyle Rayner, then you might want to use this card instead, the cost is the same but no additional effect.
7/10

This is the only red lantern character that helps to ramp dice for your team. It also makes your opponent land in an unfavourable position, either they let Gardner attack through or they have to let you ramp 1 die. Either way, it’s an advantage for you. If you don’t need the help of the dice and you just want to be more aggressive, use the 2 cost cards instead.
7/10

The second part of the ability is not that useful because not everyone will be using Black lantern. The first part is special though, Gardner acts as a red and green lantern, so you can add him into the mix if you are using the Green and Blue lantern combo. A different colour lantern team would also benefit Gardner as he acts as 2 lanterns by himself, giving you more bonuses for your other characters.
6/10

A very versatile Jordan, he can become any lantern of your choice. If you need a character that can change into any colour so you can set up your combo better, look no further. The global on the other hand, is great for and against a villain team. Not too bad for a starter card.
6/10

This is an anti-villain character. For 6 cost, his ability doesn’t seem to be very impressive. The bolt can be easily achieve with the help from Iceman global, but the damage can only be done to a villain, it takes a little too much set up just to knock out characters, I won’t really depend on this card if I want to counter a villain.
6/10

This is a great attacker if you are using a green and blue lantern combo. Although his attack bonus might not be as aggressive as the red lantern combo, but Jordan’s attack doesn’t require his other corps member to attack with him. When you have enough lanterns in your field, give Jordan overcrush and see the damage he can deal.
6/10

This is a cheaper version of Jordan, not that his ability is bad but not as impressive as the other versions. He is just another anti-villain character. If you just need another cheap green lantern, then feel free to use this card, if you want better ability, use the other versions instead.
4/10

This card is meant for the Indigo and Munk combo, so if you are not intending to use this combo, don’t use this card.
7/10

Sinestro Corps aren't really aggressive attackers; even so, there aren’t many people that will use them to deal combat damage, so you don’t really need this version of Indigo 1.
3/10

If you need more Indigo Lanterns in your field, this would be a great recruiter. However, not a lot of Indigo lanterns are very useful in the game so don’t expect the Indigo lanterns to be as good as the avengers because they are not. You would probably use her to keep getting Munk in your field, and if you are okay with that, go ahead and use this version.
6/10

This is a cheap green lantern to use. It is also a dice ramp for the team, just attack or block with Jade and allow her to be knocked out so you can have more dice to roll during your next turn. For 3 costs this card is awesome.
9/10

If you are using a green lantern combo, you definitely don’t want to miss out this card, because not only can your great lantern attacks with their synergy bonus, you get to ramp 1 die for every attacking green lanterns. The common and uncommon version of Jade are very useful for the green lantern team, you see which one you are more comfortable with and then choose that one.
8/10

This is meant for the bolt combo team, bolt characters hardly has anyone who can ramp dice for the team, so if you are going all bolts, use Jade to support the team so you get to ramp a dice every turn. She is not as good as Nova: Quasar but for 4 cost, she is not that bad.
7/10

This is another anti-villain card. Instead of dealing damage to villain, you gain health whenever your opponent fields a villain. It is rather rare to see someone using a pure villain team so you would probably not rely too much on Steward to gain health in the game.
5/10

This version of Steward can get really bad ass when your opponent has a wall of villain, but apart from that, there is nothing special about him when your opponent has no villains at all, you could use converters to make him stronger but that is too much resources to spend on for such ability.
5/10

Fielding ability on Steward is a waste, also, if you need more dice, there are other character to ramp dice for you. For 5 cost and having criteria to draw dice, I personally think it’s not worthy.
4/10

Not everyone will be playing black lanterns so you probably don’t want to rely too much of this card. Plus, he can only knocked out a Black Lantern on equal of lower cost, you might end up wasting your fielding ability if you can't field Stewart at a level higher than an opposing Black Lantern.
2/10

Another daredevil in the game, however, this is more costly but gets stronger if your opponent has more opposing mask character die in his/her field. If you are using a green lantern combo, you might want to keep this in your team, even if you don’t see any opposing mask character, you might be able to buy Kilowog at 1 cost with the help of Rayner and big entrance. For 1 cost and his stats I think it’s great, and it would be a bonus if your opponent have mask characters. Other than that, don’t rely too much on him to counter mask character, because apart from stacking up attacks, he can’t do much.
3/10

If you are using green and blue lantern characters, you might want to use Kilowog to support the team, since most green and blue lanterns are fist character, you give them an advantage that prevents mask character from blocking them. He can also supports an aggressive team given that more aggressive characters are fist characters. You can consider using him, just to assist your team, it would be great if you can get him at a lower cost.
5/10

I have a feeling Kilowog really hates mask characters. Mask characters aren’t built to go aggressive, so they probably won’t attack on the turn they are fielded or won’t attack at all. This means that you probably won’t need Kilowog at all. For a higher cost, I don't think I will use this version of Kilowog.
5/10

For a 3 cost and a potential 9A 9D is amazing, but that is if you are able to field your other green lantern fast enough to give Rayner the boost. Because let’s face it, Rayner is more used for his cost reducer card, so if you use other version of him, you need other ways to get Green Lantern out fast, I won’t rely on my opponent’s help because not everyone will use a green lantern. Jade and Gardner are one of the lowest cost, without Rayner’s cost reducer help, other Green Lantern may not be easy to buy. So think about it when you decide to use other version of Rayner.
7/10

This is a counter to a pure lantern combo team, most likely red, black or yellow, because green and blue works together, orange, sapphire and indigo will not be standalone affiliation. For 3 cost to counter red and yellow lanterns from blocking is not too bad. Despite that, I won’t use this card in a full constructed game because everyone won’t be necessary using lantern characters.
4/10

This is something like Green Arrow: Former Mayor but less powerful and harder to leave the field. If you have intention of knocking out characters, use some other cards instead. Use Rayner only for cost reduction purpose.
5/10

This is the card that makes WOL so fun to play, because all you need is 3 active lantern of the same colour and big entrance BAC and you can make a 5 cost character into a 1 cost, how great is that! I cannot emphasize how much I love this card but if you want to use red, yellow or blue and green lantern combo, you need to have this card.
7/10

This is a great damage reducer for any team, if you are sick of getting damage from opposing character, then use this power battery and keep energy of that character type in your reserve pool to prevent those damage. However, the drawback is that you need to know what to use those reserve energy for, as you are sacrificing those energies to defend yourself instead of buying characters, so you better make full use of the reserve energy or it will go into waste.
7/10

For a 5 cost and I have to pay another fist just to send a lantern character to the used pile, I think this is a little too expensive. What is so turn off about this card is that you have to send it to the used pile to trigger the effect, for defensive purpose use the common instead, for offensive purpose, use the super rare instead.
2/10

This is a great supporter for aggressive and overcrusher team. Your opponent usually will block your characters, but what make things worse for them is that your opponent has to pay 1 life for every character he wants to declare as a blocker. This action is super useful and will make your opponent’s life miserable as long as it is in the field.
9/10

A supportive die for green and blue lantern combo team, that 1A and 1D will definitely come in handy. It has the green lantern affiliation which means that you can use it to further reduce cost for Green lanterns using Rayner. This is a good action for a 3 cost.
7/10

Similar to the Blue and Green Lantern, this version helps the Yellow, Red and Black lanterns instead. Red Lantern would definitely benefit from the additional stats and yellow lantern would benefit as it has the Sinestro corps affiliation. Another great card for a continuous 3 cost action.
7/10

This is an almost similar way of use as the common lantern battery, with the exception that you are keeping the energy to deal damage instead. This is most beneficial for a similar energy type team, imagine keeping 4 bolts in your reserve pool and attacking with 5 bolt characters, you are dealing 20 damage to your opponent in an instant; you don’t have to worry too much about wasting those energies, because unlike the common lantern battery, you are using the reserved energies for damage purpose.
10/10

For 7 costs, I think this ability is great. The point for Larfleeze is for your sidekick to attack and he will stay in the field, the sidekick that attack on his behalf gets his stats, which is pretty awesome. If you are building a sidekick team with Falcon and sidekick boosting characters, that sidekick that attack on Larfleeze behalf gets the sidekick bonus and unblockable, so if you are building a sidekick team, this is the card for you.
7/10

This version is a little more powerful and more expensive version of Polymorph BAC. Changing a sidekick to someone more powerful is great, but you need to make sure that the character that replaces the sidekick is powerful enough to make you use Larfleeze to attack in the first place.
7/10

There are a lot of ways to get rid of action die; this is not one of the best ways. Fielding ability on Larfleeze is such a waste; your attacks are probably not going to go through and it is hard to knock him out. So he will get stuck in the field for your game unless you have ways to get him out. Plus, you don’t really need a 6 cost just to knock out an action die, there are other more efficient ways to do so.
2/10

If you are playing a very defensive team, then Lex would be the person that can help you ramp your dice. The catch is that you need to have more life than your opponent, so have characters that heal your life every turn so your life will be higher than your opponent to trigger Lex ability.
7/10

Lex is really greedy but that’s how he it, his ability for 3 cost is not bad but the catch is you need to have higher purchase cost character in your field than your opponent, and you do not break ties. A safest bet will be a character that is 6 costs or higher, put that character in your field and whenever you need to gain life, try to re-field Lex. If your opponent can make sure that you do not have the highest cost character fielded at all times, then you just keep Lex in the field for blocking purpose.
7/10

There are other 2 cost shield characters with lower fielding cost that has no abilities or even stronger abilities, but if you feel that you need Lex because he is cheap and you need a cheap villain or an orange lantern, then go ahead and use him.
5/10

A more costly dice ramp for your team, more suitable for villains, if you have more villains, you can choose between more dice, but at the end of the day, it is just 1 dice. There are other more powerful dice ramping characters that are cheaper though.
5/10

This version of Lyssa is fun to use; moving dice from your opponent’s used pile back into their bag is great, especially when the dice you place is a sidekick die. It increased the odds of your opponent drawing a weaker die. As much as it is fun to do that, it doesn’t affect much of your opponent’s game, because if he/she draws a sidekick die, they can still make use of it, if you opponent uses Professor X global to shift the sidekick dice to their prep area, there is nothing much you can do to stop it. However, since she has the Sinestro Corps affiliation, having her at 2 cost is not so bad if you just need a cheap yellow lantern.
6/10

This is the controller Lyssa that we are talking about. Just place Lyssa in the field and every turn, you name a character, if your opponent wants to field it, he or she has to pay 2 lives to field A die of that named character, so 4 named character means your opponent must pay 8 lives to field all 4 of them. If your opponent is relying on 1 character in the game, then all you need to do it name that character and make your opponent pay life every turn.
9/10

This is a similar version to the common Lyssa, but the catch is that you have to attack with Lyssa. It really depends on your luck when draw the dice from your opponent’s bag, if you draw a strong character dice, then it will definitely spoil or slow your opponent’s game. For me, I don’t like to rely too much luck for my character’s ability, so I still prefer the uncommon Lyssa.
6/10

The Mera global is great, it actually helps those against character overwhelm by overcrush or unblockable abilities. However, the ability is not really that appealing. It just makes Mera harder to get knocked out, and there really isn’t any reason why you would want to keep her in the field. If you need another cheap red lantern, then go ahead and use Mera, but I don’t suggest Mera common or uncommon in your team when you are using a red lantern build as her global will nerf the Red Lanterns.
9/10 (Global)

This Mera is very defensive and if you are playing different colour lantern build, you might want to keep her in the team to heal every turn. Almost every colour has a character that is easy to leave the field so it is not hard to heal every turn. What’s even better is that the global is on this card as well.
9/10 (Global)

This version of Mera helps if you are playing different colour lantern build. It works like Kyle Rayner but you need different colour lantern to trigger her ability, and her reduction of cost is only by 1 cost, so not really as good as Kyle Rayner. If you have other lantern that are 2 costs, Mera might help you to purchase them at a faster rate, but if you are intending to use her to support your expensive characters, don’t count on it.
7/10

This is a character that you will need to support a different colour lantern build. If you have all 7 lantern colour in your field, you can move a 7 cost character from your used pile into your field zone, which is really strong for a 2 cost.
8/10

This is another version of Fatality: Yrra Cynril but more costly, since you need different lantern to increase the power of their ability, you don’t need both of them in your team, so unless you don’t have fatality for any reason, don’t use Miri.
7/10

This is a supporting character for a different colour lantern build. If you prefer to spin up or down another character instead of moving them from the used pile to the field zone, then use this version.
6/10

A fielding ability on a character that is meant to crush your opponent is so wasted. The ability is great, but you need to manage your dice so well in a way that on the turn you field Mogo, your green lantern and blue lantern need to be in your used pile, or the fielding ability will just go to waste. As much as the ability is useful, but trying to re-field such a strong character sounds like an impossible task. If you can get him at 1 cost, then just by looking at his stats it is still reasonable, but 6 cost purely on his ability is a waste.
5/10

The ability is simpler to use, but the highest lantern is only 7 costs, so why buy a 6 cost character and then try to field it to buy some other character for a cheaper cost. It is just too much process to go through just to buy characters at a cheaper price.
5/10

If you are so scared of the Black lanterns, use this card to protect yourself. But to be honest, you will probably not buy him anyway. If someone is truly playing a black lantern team, which is really rare, the counter will be too ineffective and too slow, so you probably lose the game before Mogo shows up.
2/10

For a blank card and his stats and costs, I think it is not really that strong, but if you can use Rayner ability to make 1 cost, things will be different.
4/10

For his ability, it is decent, and again, he doesn’t have a really strong ability that is worth 5 cost, so include him in your team only if you can reduce his cost to 1 or 2.
4/10

There are level 2 and 3 characters that still can block him, by the time you get him into the field, expect a lot of characters that are level 2 or above in your opponent’s field. However, if you can have ways to make your opponent spin all their character down to level 1 and also purchase Mongul at 1 or 2 costs, then I would say this card is brilliant.
5/10

For a 2 cost to get a potential 5A 5D is great, if you have Indigo 1 in your team.
7/10

Munk can be a great blocker or attacker if your indigo 1 is present. However, Munk doesn’t really have a great ability that you want to keep him in the field, and 3 cost with no bonus attack stats doesn't help either, so I still prefer the common version because he is 2 costs and has great stats, a swarm of the common version will be more deadly than a swarm of this version.
7/10

There isn’t another Indigo tribe character in the game that is so good that I will use an Indigo tribe build. So the only other character that I will use is Indigo 1 for his ability. And the only Indigo 1 that I will use is the common version, which works better with the common Munk.
6/10

The parallax ability isn’t really that good that I would want to buy it, however, the global is the game changer here. Just pay 1 generic and you can roll any number of dice, both in your reserve pool and your field zone. This will definitely help you in the game if your luck with your character dice is not good.
9/10 (Global)

This version of Parallax is fun as it controls a lantern and you can attack with it. But for 7 cost and a fielding ability on high character stats, I will pass, what’s worse is that this version has no global.
6/10

Being able to buy an action die for 1 cost is intriguing but for 6 cost character to have criteria in order to do so is ridiculous. If you need the global but you don’t have the capability to buy the super rare version, just use the common version.
9/10 (Global)

Ranx is a good blocker, and but what can make things even better is if you can buy Ranx as cheap as possible, he will be a great asset to your team.
7/10

This version is very specific; any character that only specifically targets an energy type is not very useful. Your opponent might not have bolt characters in their field and if that is the case, you are wasting 1 precious space in your team.
5/10

This version of Ranx helps when you don’t want your attacker to get knocked out or you want one of your opponent’s fielded characters to get knocked out, the ability to switch blocker sure is helpful. Similarly to all other Sinestro Corps character, it would be best if you can get them to a lower cost.
7/10

She is a great Titan supporter, feel free to attack or block with your titans characters, because when they do get knocked out, you have a 50% chance of getting them back into the field, or if your luck if great, you get them back at a higher level.
8/10

This version of Raven act as a sacrifice to another character you want to keep in the field. There are some characters that you just can't afford to lose, so losing Raven might be a wiser choice, you can always get her back on your next turn. She can be very versatile and can protect anyone, so she is a great supporter.
7/10

This is the shield to your mask or Titans team; your opponent cannot do anything to them when Raven is active. She is a great protection to your team.
9/10

For 2 cost to get such a stats is incredible, so just keep a cheap Green Lantern in the field and field Saint Walker. 4 Saint Walker can make your opponent lose hope in their game, what an irony.
7/10

This version of Saint Walker is more expensive but has an additional ability. The ability isn’t anything special, so if you are not confident that your opponent will have a villain in their team, you can just play with the common version instead.
8/10

Saint Walker is more expensive than the other 2 version of him, but you are able to get a potential 8A 7D if you can fulfil the requirement for his ability. It is rather expensive to get the stats for 5 costs, but if you can fully make use of his bonus stats, then go ahead and use this version, if you can’t, stick to the common one instead.
4/10

This is a little control ability that Scarecrow possesses. Increasing the fielding cost of a chosen lantern colour might be small, but if your opponent plays a single colour lantern build, it might become very costly for him or her to field their characters. However, Scarecrow don’t work against non-lantern build, so if you can predict your opponent bringing a lantern deck, then go ahead and use this.
4/10

Instead of increasing fielding cost, Scarecrow deals damage whenever a chosen colour is place in the use place, this includes; buying a character of the chosen colour, that character of the chosen colour attacks and goes to the used pile or using energy of that character die and then sending that die to the used pile after using it. This is really a good controller, the problem again is that your opponent might not be using a lantern deck, so it depends on how much can you predict from your opponent. Also, the ability affects both players so don't mix in too many lantern characters if you decide to use scarecrow, it might backfire against you.
4/10

This is a different version of the AVX Storm: African Princess, it helps if your opponent have more than 1 copy of the same character in their field, but it also counters your character if you have any copy of the chosen die. There is a luck factor in the ability, and unlike Storm: Wind Raider, you don’t deal damage to your opponent for the dice that shows energy. If you are trying to counter multiple copies of a die then this would be good, if not, use Storm instead.
6/10

This is a great Sinestro; it makes your opponent having to keep energy every turn just to block Sinestro. If you can make this character into a 1 or 2 cost, it makes a really great attacker for the team.
7/10

Sinestro is a little hard to get knocked out. Also, if your opponent doesn’t play Lantern characters, this ability is basically useless. If you don’t want to risk that, use the other version for this character.
3/10

This is really a risk to take when you are playing in a constructed format, if you can predict that no one will bring any lantern character in their team, you can put this character in your team and you get to deal your opponent 2 damage every round. That is also given the fact that you do not have any other Lantern colours being active.
7/10

Sinestro Corps character are not really build to attack, so giving them the bonus probably won’t help much, but if you are want to try something new such as attacking with Sinestro corps, then go ahead and use Sinestro to support your team.
7/10

Fielding ability on a high cost and high stats character isn’t really a smart thing to do, and his ability is nothing appealing to me since you cannot choose who to knock out in your opponent's field, and as far as the global is concern, if you really need to use the deal damage global, use Magic Missile instead.
6/10

Even if you are trying to be aggressive, you don’t need this character, he is 6 cost and you don’t want to waste your time purchasing him only to force everyone to attack. Your opponent might not necessary suffer because of his ability, attacking is nothing hard to do, and if you want to force your opponent to attack just to get rid of characters, there are better ways to do it.
6/10

This Spectre helps your Red and Black Lantern to reduce their purchasing cost, but with Rayner ability and big entrance BAC, you probably don’t need Spectre’s help.
6/10

She is basically the reason why you want to use a titan combo team. The common version deals more damage as her ability triggers for each active titans including herself, for the current release, you can deal up to 5 damage to your opponent when you field Starfire, when she is in the field, you need to find ways to get her out so she can trigger her ability again.
7/10

This is a more expensive Starfire, but in this case, she won’t be required to attack, all you need is to attack with the other titans or make them get knocked out regularly so you can keep fielding and dealing damage to your opponent. A little bit too expensive to keep spending fielding cost just to deal damage, plus there is a chance that your Titans is 0 fielding cost.
6/10

This is an aggressive Starfire, because when you attack, you deal damage to your opponent for each other titans in your field. A potential 4 damage for each attacking Starfire, so if you keep attacking with your Starfire, you will see your opponent being knock out by her very soon. If more Titans are coming out in the future, your Titans combo will be super strong.
8/10

Character that specifically targets a specific energy is not reliable. There are good bolt characters that you are worried about but Superboy isn’t the best solution to counter them, a 6 cost to get rid of only 1 character is not a good deal.
3/10

This is a more usable Superboy, if you are afraid of your opponent’s bolt characters, then get Superboy out, and when you knock them out, they go to the used pile, that is more effective against a bolt team. You can keep him in your team just in case, or if you are not that worry about bolt characters, you can skip him.
5/10

The high stats fielding ability issue again. What is worse? He is 7 cost. The other 2 version would be more ideal. Since he is a Sinestro Corps, you can use Rayner and make as cheap as possible just to get his stats.
3/10

Her stats are great and she has overcrush, but it would be even better if you can reduce her cost to as low as possible.
7/10

For a 6 cost character, it is a little too expensive for a sidekick booster. If you need her for the additional stats from your sidekick, then go ahead, but to me, it is really expensive for her ability.
7/10

Forcing opponent to block isn’t a bad thing, but your opponent get to choose who to block with their character. For a 7 costs to force everyone to block, no matter what your strategy is, it is too costly and too slow.
6/10

Making this character’s cost to as low as possible would be a great disaster to your opponent. Imagine having 4 flashes attack, your opponent needs 12 characters to block him or all the attack goes through. That is really hard to swallow for your opponent, not forgetting that you have other characters to attack as well.
7/10

For 3 cost and his stats, I think flash is decent. If you need a low cost blue lantern, you can get him, but since there are already other blue lanterns that are low cost, you might want a stronger flash.
7/10

This is more cheaper than the common version, but the ability isn’t as good, if you have 4 flashes, you can make 4 characters unable to block, however, if your opponent has more characters than you, your ability is not going to help much. If you can have a more characters in your team at all times then go ahead and use this Flash.
7/10

This is another cheap Blue Lantern that has a penalty, so if you want the numbers and stats for a Blue and Green Lantern build, this is the Warth for you.
7/10

This is another version and another penalty for using Warth, however, the penalty is not really that bad. Warth has a fielding cost of 1, so if you keep using that die you ramp to re-field him, knocking him out is not that bad. If you have another active lantern character, he stays in your field, so it is not likely you will take the penalty.
7/10

This is an awesome ability. If you have a fielding ability that is good but that character just have difficulties leaving the field, then use Warth to help trigger it. This character is just so versatile; he can activate any of your active characters fielding ability, so he is definitely a good rare card.
9/10

If you find that Raven: Azarath Metrion Zinthos is too expensive, then try using this instead, unlike Raven, instead of preventing targeting effects, you redirect that effect instead if able. There are some targeting effects that cannot be redirected, but for a 2 cost it’s a good protection for your titans.
8/10

Wonder girl protects your sidekicks from being easily knocked out, so if you are playing a sidekick team, you need her in your team in the early game. She can be a very supportive character that your other characters doesn't get knocked out easily, but your characters need to be at level 1, regardless for 3 cost, the ability is decent.
8/10

This version is an anti-sidekicks card. With Wonder Girl active, your opponent will think twice before fielding a sidekick, and when you attack with a sidekick, your opponent will think twice before blocking it. Such a card ability for only 3 costs is amazing.
8/10

If you are playing a pure Shield Characters in your team, then this Wonder Woman will help you if you are using sidekicks to attack. In any other team, it is rather hard to get 3 shield energies in a roll, even in a sidekick team, if you want your sidekicks to become unblockable, use Falcon: Recon instead.
8/10

Wonder Woman is not hard to get knock out, so if you have a lot of Shield Energy in your reserve pool, go ahead and trade them in for damages. Shield reserved energy can be a lot of help so don’t under estimate them.
7/10

If you want to redirect damage to a character, you can use AVX Iron Man global instead, so there is no point to have her active just to do that. Wonder Woman defence is not very high so at most you can redirect up to 4 damage to her, and that is given that you have 4 shield energy in your reserve pool, for 5 cost, I think that's not very powerful. I am disappointed with this Super Rare given that all other Super Rare, except Parallax, in this set are usable. If you want to use Wonder Woman in this set, use the uncommon version instead.
7/10
Conclusion
I am really impressed with this set given that there are so many new combos introduced to the game. For those of you that are tight on your budget but still wants to complete a set, this is the set to look out for. The set itself is best played with one another and the cards support each other as well. This stand alone set is good enough if you don't want to interact with other sets, very few or no characters actually need the help from other set, which makes this set so amazing by itself. If you are not a DC fan, you can still get some of the card in this set to boost your other set. And again, hope that my review helps and thanks for reading.